Every summer, Ontario homeowners face the same moment: a wasp nest appears on the eave, near the shed, or worse, inside the wall, and the first instinct is to grab a can from the hardware store and deal with it before dark. That instinct gets people stung. DIY wasp nest removal in the GTA is entirely possible in the right conditions, but the difference between a safe removal and an emergency room visit comes down to honest nest assessment, Ontario legal product selection, and a step by step process built around how wasps actually behave, not how confident you feel standing in the spray aisle.
When DIY Wasp Nest Removal Is Safe
High Risk Conditions That Rule Out DIY First
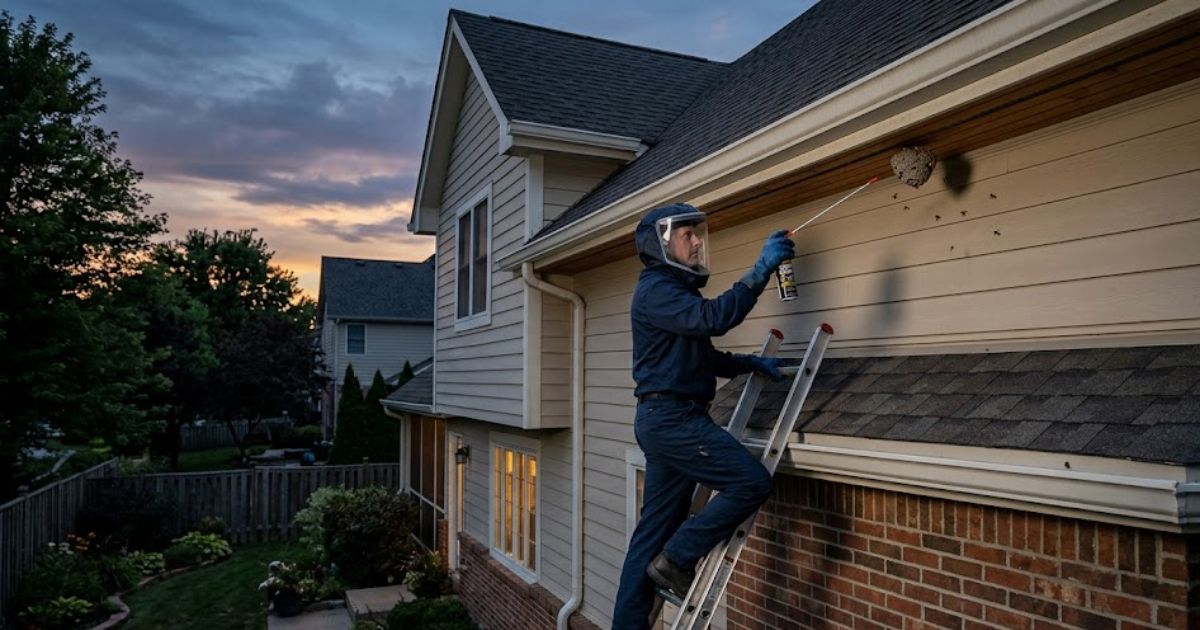
A large wasp nest inside a wall void, attic nest, or ceiling cavity is a professional only scenario full stop. Underground colony setups like a yellow jacket burrow or ground burrow in a soil cavity hide hundreds of wasps you cannot see. Any known allergy household where an EpiPen required situation exists carries serious anaphylaxis risk from one wrong move. Structural nest locations near electrical wiring proximity, a chimney nest, crawlspace nest, insulation nest, siding gap nest, or second floor nest where a ladder required situation creates a high volume colony escape risk these are concealed nesting sites that cross the licensed exterminator threshold fast. An interior wall infestation, roof nest, enclosed space nest, or any inaccessible nest inside a structure signals an aggressive colony requiring professional hands, not yours.
Safe Conditions That Make DIY Reasonable
A small nest below grapefruit size, following the grapefruit rule on eaves, an aerial nest, paper nest, or hanging nest in a low foot traffic zone makes do it yourself methods worth trying. An outdoor nest, visible nest, and accessible nest in an early stage colony with a single nest and no allergy household status clears the basic allergy screening and safety evaluation check. Store bought wasp sprays, dish soap and water spray, or homemade traps using sweet liquids work well here. Approach only at dusk or dawn when less active wasps reduce your sting risk, always wearing protective clothing. Wasp traps also help manage a small wasp problem without direct contact.
The DIY vs Professional Decision Matrix
This decision framework runs a quick situation assessment on four points nest size threshold, nest accessibility check, structural location check, and colony size evaluation. A nest type classification as an aerial nest in an open, reachable spot with no allergy household confirmation gives a green go or no go decision for self removal. Any inaccessible nest, multiple nests, or allergy flag flips the risk benefit analysis toward a professional referral trigger. Use this removal safety checklist as your DIY criteria before buying anything. Removal feasibility depends on honest homeowner capability, not confidence alone. An informed removal choice starts with nest location scoring and hazard level classification, not the spray aisle and here is the proper guide of Diy vs professional wasp removal
Ontario Legal Requirements Before You Buy a Product
What PCP Approved Really Means for Canadian Buyers
The Pest Control Products Act governs every wasp pesticide Canada sells legally. Health Canada runs this through the PMRA the Pest Management Regulatory Agency which assigns a pesticide registration number to every federally registered product. Buying anything without that number puts you outside Canadian pesticide law fast. A non registered pesticide risk goes beyond just safety it creates a real home insurance implication if something goes wrong during removal. Every PCP approved product carries label instructions tied to pesticide label compliance, listing the exact approved active ingredient and legal use conditions. Regulatory compliance here protects you legally, not just physically. Legal pesticide use means following the pesticide safety standard printed on that label word for word.
Right Product Types for Ontario DIY Jobs
A long range aerosol spray with 20 foot reach spray or 27 foot reach spray distance handles most outdoor nest situations safely. Wasp freeze spray drops an aggressive colony fast using a fast knockdown spray formula that stops flight instantly. For ground nest treatment, a dusting powder applied through a hand duster or puffer bottle delivers residual treatment deep into the yellow jacket burrow. Insecticide dust using a pyrethroid insecticide or permethrin spray base works as a strong residual insecticide that keeps killing for days. Any PCP registered aerosol from a hardware store pesticide shelf carrying a registered wasp product label qualifies as a legal product use option. A jet spray or pressurized insecticide format works best as a nest entrance spray for aerial nests. Foam insecticide seals and kills inside enclosed space nest situations where a contact insecticide alone misses deep chambers. Always match the wasp specific pesticide format to your nest type before buying a long distance applicator saves you from getting too close.
Timing Your Removal The Ontario Seasonal and Daily Window
Best Time of Year in Ontario
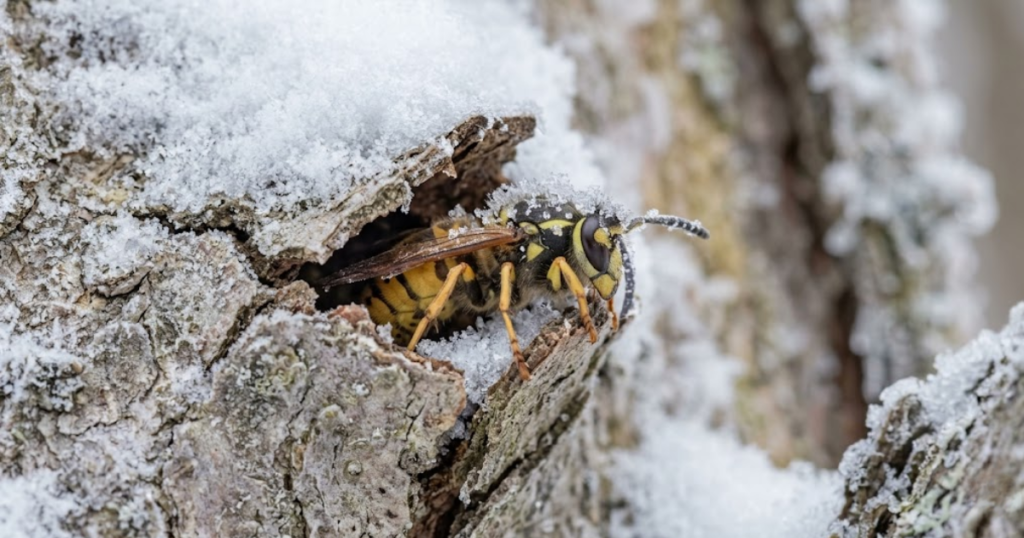
The Ontario wasp season runs on a strict clock. One overwintering queen starts a newly formed colony in May, making early spring removal your lowest risk shot. A May nest or June nest stays small and catches it before the colony growth stage explodes it. The GTA wasp season hits its worst point at August colony peak, when late summer aggression makes every job dangerous. September peak activity follows, driven by colony maturity stage defense instincts kicking in hard. Fall removal caution applies because yellow jacket season Toronto stays hot until first frost. Winter wasp death ends the cycle, but a spring inspection before warm weather pest activity returns stops the next summer infestation risk early.
Best Time of Day to Treat Any Nest
Nighttime removal works because the entire colony enters a colony rest period with reduced colony mobility after dark. The wasp inactivity window between 9pm and 5am gives you full nest occupancy inside the structure and zero flying defenders outside. Peak forager hours run 10am to 3pm daytime avoidance during that window keeps you safe. A nocturnal approach using a red filtered light lets you see without breaking the low activity period. Dusk treatment and early morning removal both work, but the deepest wasp forager absence sits at midnight. Optimal spray timing targets that least active period for the highest contact kill rate.
DIY Wasp Nest Removal Process
Step 1 Identify the Nest Type and Location
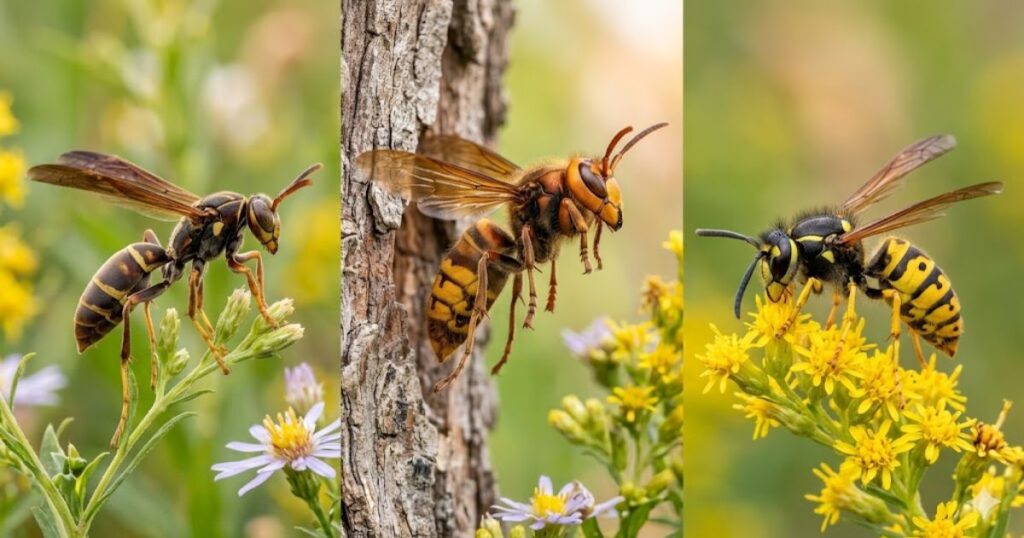
Nest identification starts before you touch anything. An aerial nest made of chewed wood fiber and saliva construction hangs from eaves, a tree branch, shed, or garage the paper nest shape looks like a grey balloon. A ground nest shows a worn soil path with heavy wasp entry point traffic going underground. Check for a buzzing sound wall or wall void indicator inside your home that signals a concealed nest you cannot treat yourself. Measure nest size against a grapefruit comparison anything larger stops the DIY plan cold. A yellow jacket nest, hornet nest, or paper wasp nest each have a distinct nest entrance hole and nest material texture worth knowing before you buy any product.
Step 2 Set Up Your Escape Route Before Anything Else
Retreat planning saves you when the spray hits and wasps pour out fast. Clear one unobstructed exit behind you, never deal with a wall proximity risk or enclosed space danger blocking your back. A two person safety protocol works best one treats, one watches this buddy system gives you eyes on the colony during the removal staging area setup. Tell everyone inside the house before you start household notification is your pre-treatment briefing step. Know your open retreat direction and practice a rapid retreat capability walk through before dark.
Step 3 Prepare Your Product the Right Way
Label reading comes first every application distance and spray duration seconds detail lives on that label. Do a spray direction test away from the nest to confirm nozzle check and canister pressure check pass before dark. Load your dust applicator with puffer preparation done in daylight gloves on preparation and full PPE donning sequence happens before you leave the house. Check product quantity assessment against the nest size so one can cover full nest coating without running short mid treatment. Aerosol priming and product shaking take ten seconds but confirm treatment readiness before approach.
Step 4 Approach and Treat at Night Only
Night treatment approach means slow, deliberate steps abrupt movement danger triggers a defensive wasp trigger faster than the spray does. Use a red flashlight with a ground angled beam to see the entrance hole targeting point without lighting up the nest face. Hold your treatment application distance at label range and start continuous spray application directly into the entrance. Follow label directed duration exactly stopping early cuts of insecticide penetration and leaving live wasps inside. After full nest coverage and contact kill application, do an immediate retreat the no wait retreat rule means you walk away before wasps regroup.
Step 5 Confirm the Nest Is Inactive Before Removal
Nest inactivity confirmation requires a full 30 minute observation from a safe distance the next morning. Look for zero flight activity and wasp traffic absence around the nest entrance hole during daylight inspection. No buzzing sign and dead wasp presence on the ground below confirm colony mortality confirmation. Any movement at the entrance triggers a repeat treatment trigger run a second treatment decision that same night before touching anything. A clean post treatment check with activity cessation and wasp absence verification gives you re-entry authorization to remove the dormant structure safely.
Natural and Non Chemical Removal Options
A dish soap water mixture kills wasps through spiracle blockage soap coats the breathing pore blockage and causes wasp suffocation within seconds of contact. Apply it through a squeeze bottle application or garden sprayer aimed directly at the nest surface. This non toxic method works only on a baseball size nest or smaller during early stage nest treatment; anything bigger laughs at soap water. The chemical free removal window closes fast once the colony grows past baseball size nest territory.
The biggest common myth debunking moment here is that a soap water spray does not penetrate deep chambers, so limited penetration leaves the queen and inner colony alive. That natural alternative limitation turns a promising eco-friendly treatment into a DIY failure cause fast. Worse, incomplete treatment creates colony dispersal risk wasps scatter into walls or nearby structures, making the next job harder. That temporary dispersal danger is why we treat small nest treatment cases with soap only when the entire exterior surface stays reachable. The natural wasp killer label sounds good on a blog but carries real ineffective method risk on any nest above baseball size and here is the guide of natural wasp control methods
Common DIY Mistakes That Lead to Stings and Failures
A daylight treatment error ranks as the most common mistake we see in Toronto jobs. Foragers are out during the day, so daytime forager absence from the nest fools you into thinking the colony is small. Spray then, and you get an incomplete colony kill returning foragers find a damaged nest and attack anything nearby. A white flashlight mistake at night makes things worse wasp light attraction pulls the entire colony toward your face instantly.
Loose clothing danger is real wasps find gaps and the wasp crawling under risk turns one sting into ten fast. A slow retreat mistake after spraying triggers a disturbed colony response that chases movement. Premature re-approach before the 48 hour window violation passes leaves live wasps inside ready to defend. Insufficient spray reach from standing too close creates close proximity danger that no PPE fully stops. A wall void misdiagnosis treating an exposed nest when the real colony lives inside the wall causes nest survival and becomes the number one repeat infestation cause the following season.
Preventing Future Nests at Your Ontario Property
Seal Entry Points Before Spring
A March inspection Ontario catches roof edge gap, siding gap repair needs, and foundation gap issues before queens start scouting. Eave sealing, soffit repair, and attic vent screen installation block the most common wasp exclusion points on Toronto homes. Caulk application with exterior caulk closes wall gap sealing and crack sealing spots fast. Add vent screening with mesh installation at every open building envelope gap, plus chimney cap, window seal, and door seal checks. Weatherstripping and structural gap repair finish the pre-season sealing and eliminate every access point elimination risk before May.
Remove Nesting Attractants Around Your Property
Shrub trimming and tree trimming remove the overgrowth removal spots queens scout first. Tree stump removal and rodent burrow filling eliminate every abandoned burrow and yellow jacket ground site on your property perimeter. Wood pile management, hollow tree removal, and abandoned structure removal cut nesting habitat reduction at the source. Regular short grass maintenance, debris removal, and structural clutter removal finish the landscape maintenance and vegetation control loop that stops nesting site elimination problems before they start.
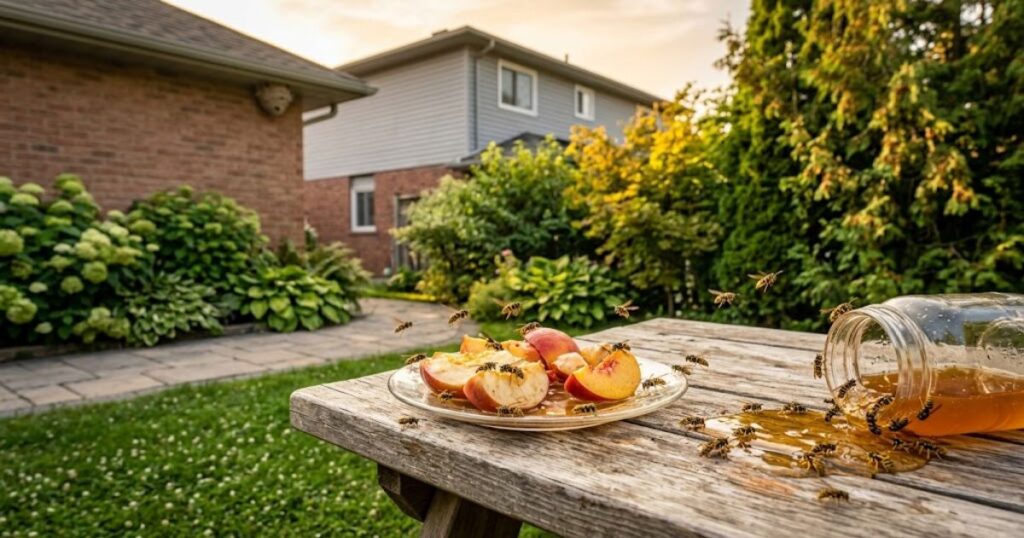
Reduce Food and Water Sources Near the House
Outdoor food coverage with sealed food containers and tight lid containers removes the biggest wasp food attractant on any Toronto patio. Garbage bin sealing with sheltered garbage storage and collection day bin placement stops foragers from finding your bins. Bin rinsing removes soda residue removal and juice residue buildup that pulls scouts in fast. Standing water removal, gutter cleaning, and outdoor leak repair cut every stagnant water elimination and moisture source elimination point wasps use as a water stop.
Hang a Decoy Nest in Early Spring
Decoy nest placement works because of territorial wasp behavior a queen avoids building near an existing colony. A fake nest spring installation at eave placement, porch corner placement, or garage door placement covers every nesting hotspot coverage zone on your property. Buy fake nest hardware from any store carrying decoy nest availability stock and hang it before May placement timing closes. This spring deterrent and visual deterrent approach costs under $15 and delivers real colony deterrence as a prevention first approach to spring pest prevention.
Why Choose Pestiseed for Wasp Nest Removal
Most wasp removal Toronto jobs we see started as a DIY attempt that made the colony angrier. Pestiseed sends a certified technician using Health Canada approved products on every single job. Our professional grade treatment reaches wall voids, ground burrows, and attic colonies that store sprays never touch. Every Toronto pest control and GTA pest control job we handle comes with a colony removal guarantee built in.
24/7 pest control response means no nest waits until Monday. Our eco-friendly extermination method uses the lowest effective dose safe for kids and pets. Each professional wasp removal includes a nest recurrence prevention check so the problem stays gone. That satisfaction guarantee covers return visits at no extra cost pest control Toronto homeowners get a fully licensed pest control team and a licensed exterminator who resolves the risk, not just the nest.
FAQs
Is it dangerous to remove a wasp nest?
Yes, removing an active wasp nest is considered dangerous. Disturbing a nest can trigger a swarm of defensive wasps, resulting in multiple painful, potentially life threatening stings, especially if the person is allergic.
Will wasps return to a removed nest?
Wasps follow a pheromone trail back to familiar spots. Full nest disposal and entry point closure break that trail. Hang a decoy deterrent to stop a returning wasp queen from rebuilding. Preventive sealing stops nest recurrence completely.
What time should you kill a wasp nest?
Treat at dusk or dawn during the wasp inactive period. All foragers sit inside during this low activity window. Use a red filtered flashlight to stay safe. This nighttime treatment timing gives full colony exposure in one shot.
Do more wasps come if you kill one?
Yes. A crushed wasp releases an alarm pheromone that triggers a colony defensive response fast. The whole nest reads that distress signal and attacks. Retreat immediately after spraying, never wait to watch results.
What is the lifespan of a wasp nest?
Most nests follow a one season nest cycle. A spring nest foundation grows through summer and hits colony maturity by August. Fall colony decline follows, then winter nest death kills workers. Only queen overwintering survives to start again.
Get Protected or Get Help Pestiseed Is Available 24/7
Some nests need a professional exterminator not a YouTube tutorial and a prayer. Large nest removal, wall void extraction, and structural nest removal sit outside safe DIY territory every time. Pestiseed’s licensed removal team covers the full GTA service area with 24/7 wasp help and a fast response team ready for emergency nest removal any hour. Contact our Toronto wasp removal service for certified pest control and professional nest treatment that handles every nest type ground, aerial, or inside your walls.